
How to Create Your First Storyboard: A Gentle Step-by-Step Guide for Beginners
June 5, 2026
June 5, 2026
Imagine this: your story is already alive inside you—full of emotion, movement, and vivid moments. But right now, it feels scattered, like pieces floating in the air.
What if you could gather those ideas, shape them, and see them clearly in front of you? That’s the quiet power of storyboarding.
Whether you’re a filmmaker, animator, or indie creator, your first storyboard doesn’t have to feel overwhelming. It can be simple, visual, and even enjoyable.
In this beginner-friendly guide, you’ll learn how to turn your ideas or script into a clear visual plan—no drawing skills required. Just your vision and a bit of structure.
By the end, you’ll feel more confident and ready to bring your story to life.
Welcome to your first storyboard.
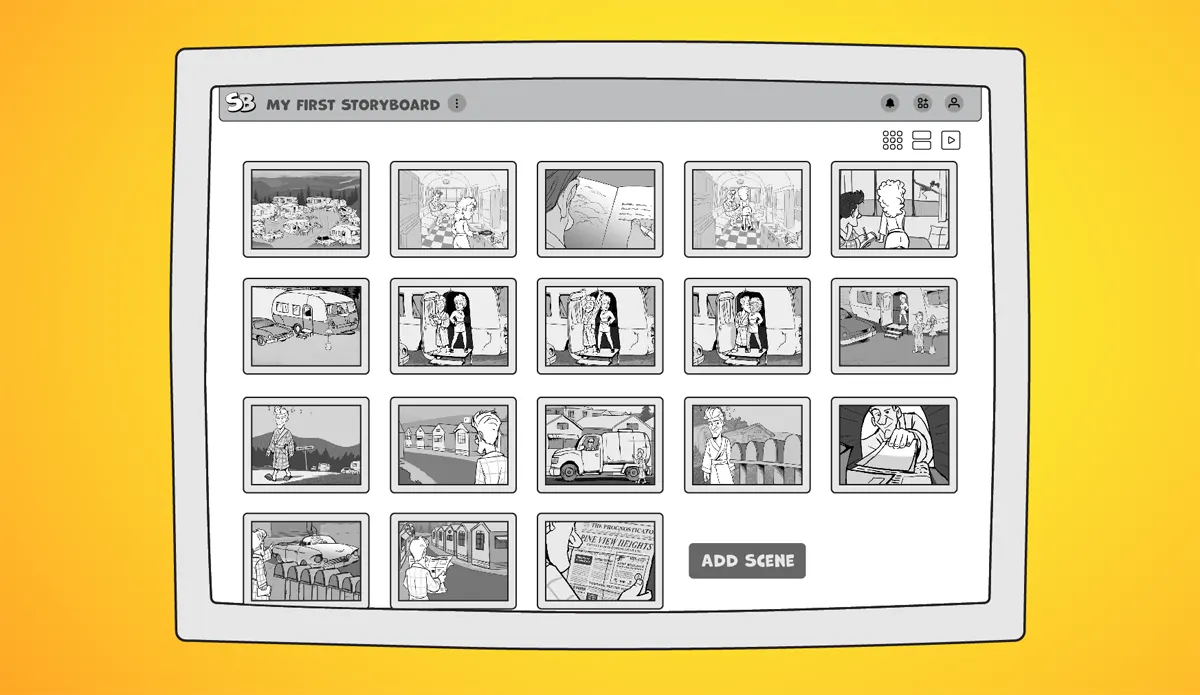
Your very first storyboard coming together — clear, organized, and full of possibility.
A storyboard gives your story direction. Instead of guessing what comes next, you can see your scenes unfold before production even begins.
It helps you:
At its core, storyboarding connects two essential parts:
You don’t need everything figured out to begin. Even one scene is a meaningful start.
Today, choosing the right storyboard tool can make this process significantly easier. Most creators look for flexibility—something that lets them arrange scenes freely, update visuals quickly, and share work without friction.
1. Choose Your Format
Start by deciding where your final video will live. Your storyboard should match that format.
A safe default is landscape (16:9), the standard HD format (1920 × 1080), this blog post explains aspect ratios. This works for YouTube, presentations, and most digital platforms.

The first gentle step — naming your story and starting a fresh storyboard.
2. Start Simple
Begin with a blank project and give it a name. That’s enough to get started.
Your storyboard will grow over time. Focus on two basics:
You can always add camera notes, dialogue, and details later.
3. Bring in Your Ideas
If you already have sketches, images, or a script, import them into your storyboard tool.
For example, StoryBoom supports formats such as WEBP, JPG, and PNG, making it easy to import existing work and start organizing right away.
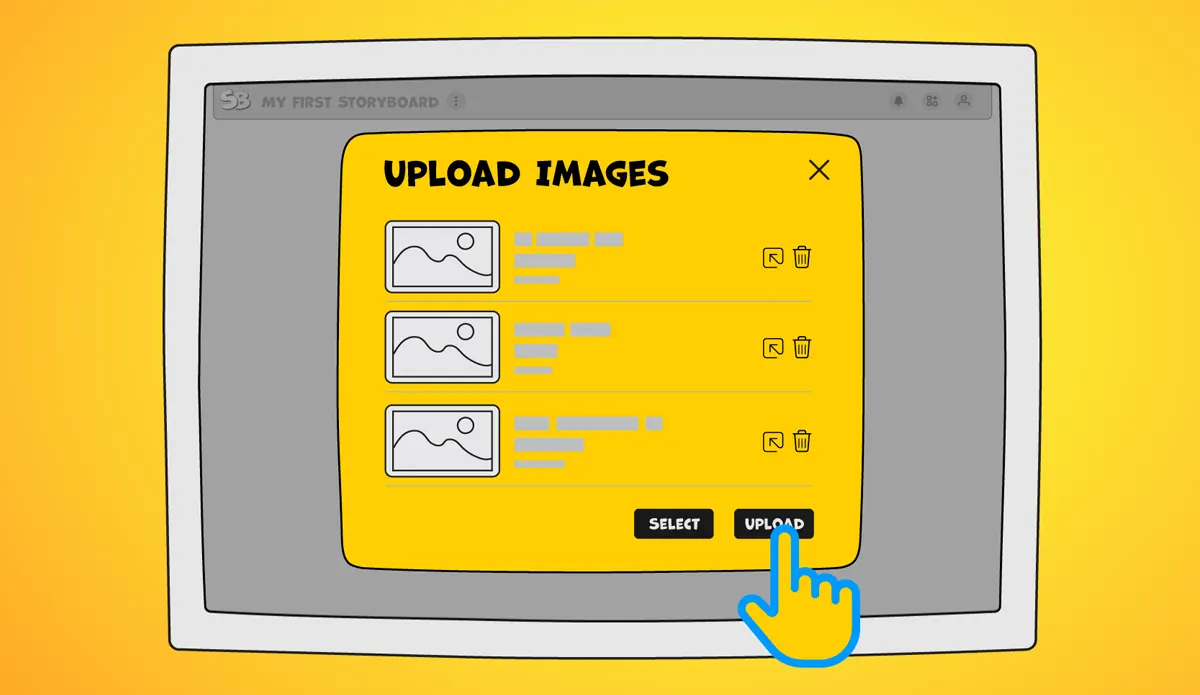
Easily bring your sketches and visuals into the canvas in just a few clicks.
4. Build and Arrange
Add your images and text. The real power comes from being able to move scenes around freely.
Storyboarding is rarely a straight line — you’ll often rearrange, improve shots, and see everything from the viewer’s perspective.
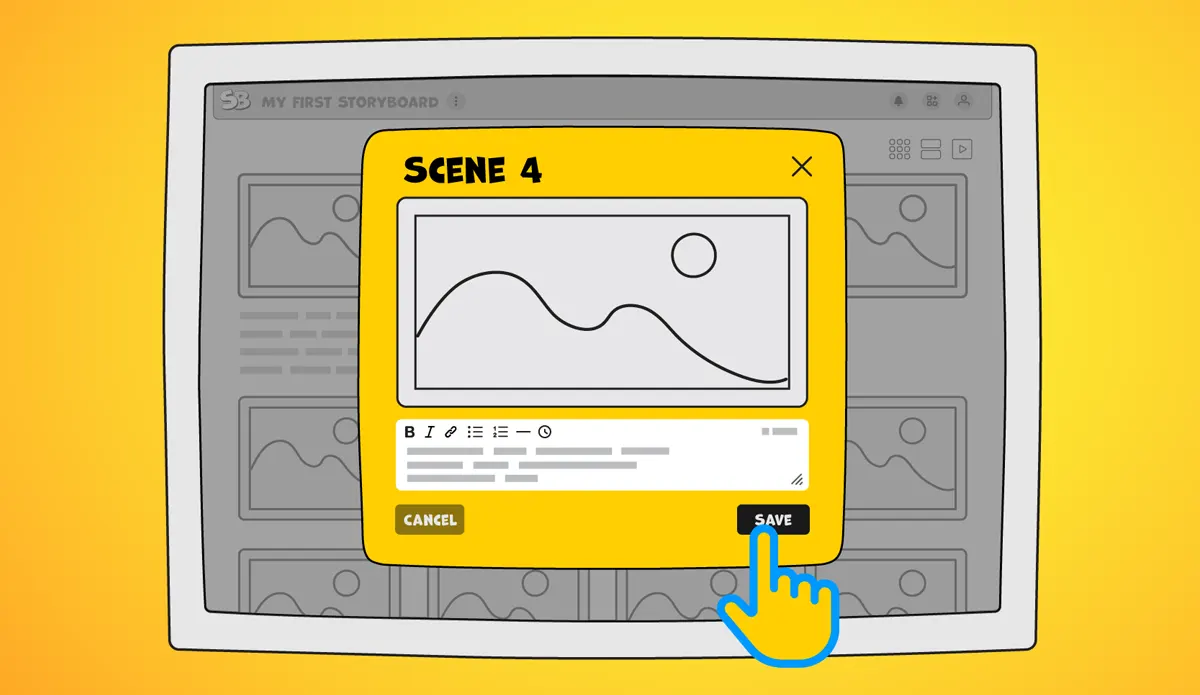
Deepening each moment with notes, dialogue, and emotion.
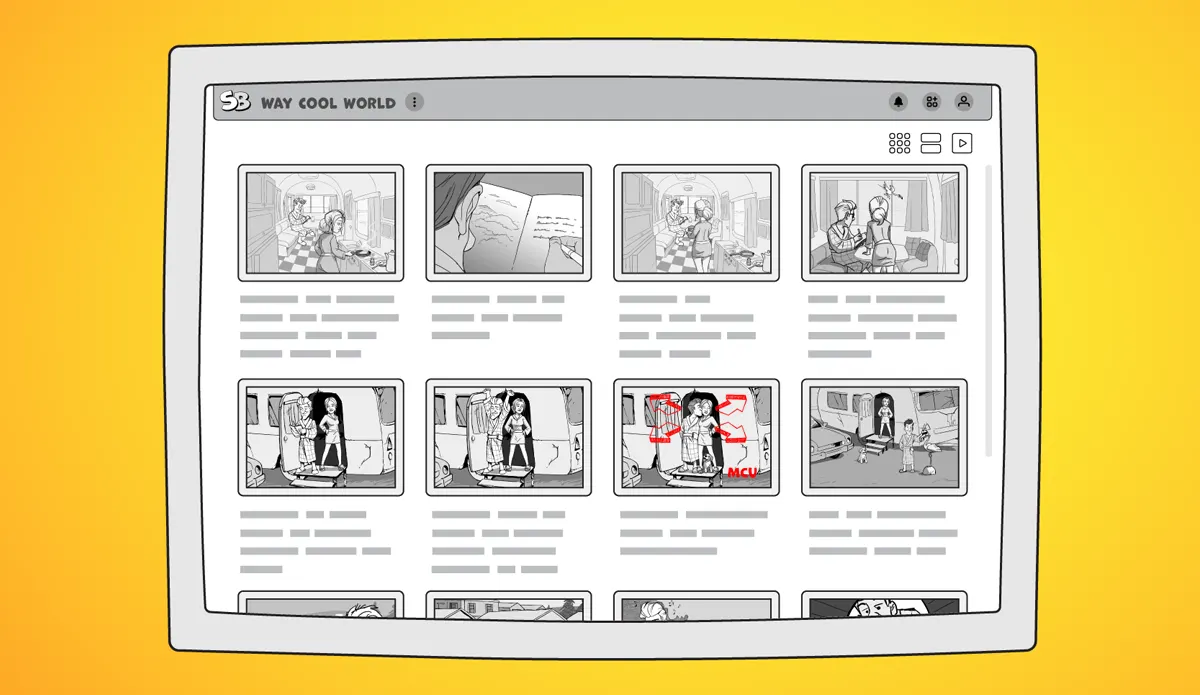
5. Add Direction and Emotion
Use simple annotations to guide your vision:
Clear visual direction helps you and your team understand not just what happens, but how it feels.
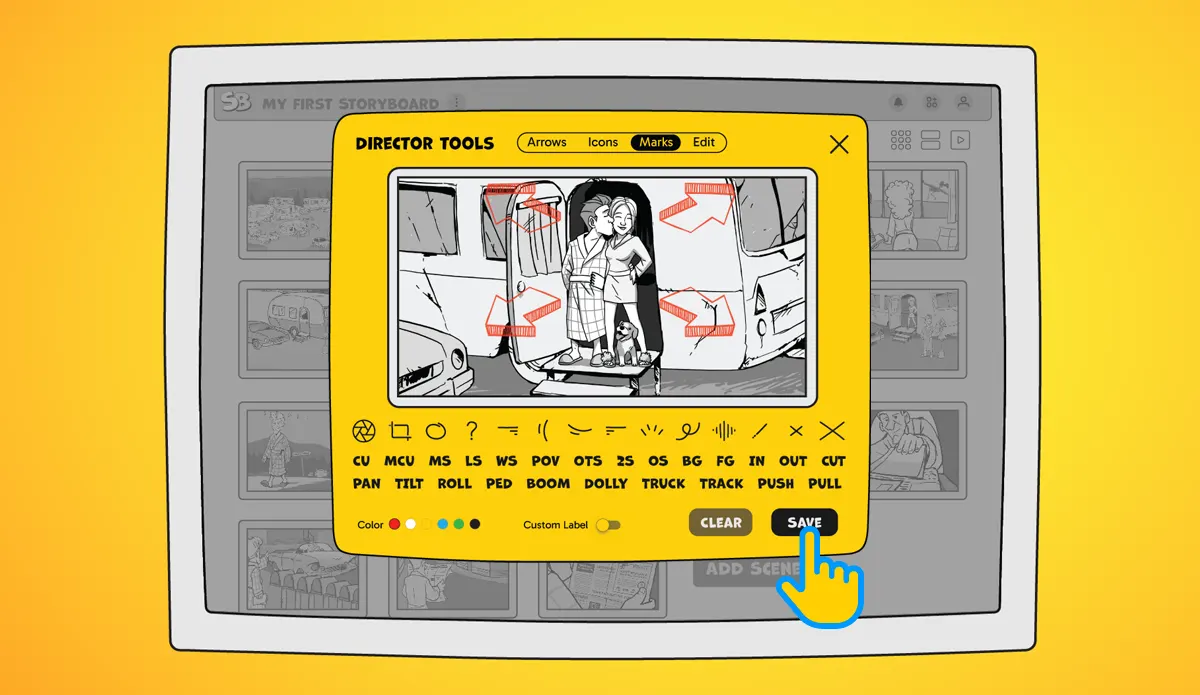
Bringing direction to life with arrows, symbols, and camera notes.
6. Share and Get Feedback
A storyboard is meant to be shared.
Send it to collaborators, clients, or friends early. Feedback at this stage can save significant time later in production.
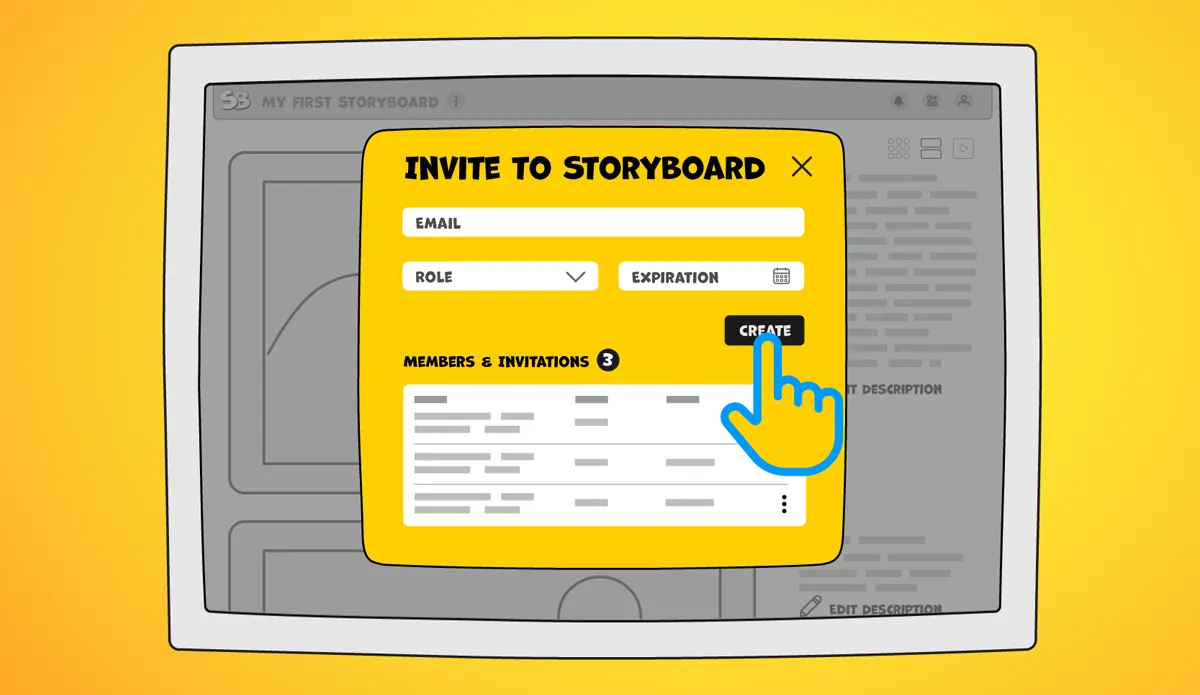
Share your story and invite others to give feedback — storyboarding is better together.
7. Export and Use in Production
Once your storyboard is ready, export it for use.
You might:
A well-structured storyboard can be carried directly into production.

One click to export your complete storyboard as a clean PDF, ready to share.
I create my graphics and sketches in Illustrator and export them as PNG files. Then I import them into StoryBoom and build the storyboard scene by scene, adding descriptions, narration, and frame timing when needed.
I constantly review and rearrange frames to see how the story flows. Later, when I move into Premiere Pro, those same images become placeholders in my timeline.
This approach saves time and reduces uncertainty. The storyboard becomes a working blueprint for the entire project.
StoryBoom is designed to make storyboarding simple and flexible, especially for creators just starting out.
Key benefits include:
The platform focuses on usability first—helping you build and refine your story without friction.
New features are in development, including a mobile app for the Apple App Store and expanded functionality, with AI tools planned for future updates.
Adding rich descriptions to each scene so your story flows beautifully.
Creating your first storyboard is a meaningful step. It turns abstract ideas into something visible and actionable.
You don’t need perfection—just a starting point.
Frame by frame, your story becomes clearer, stronger, and easier to share.
If you’re looking for a simple place to begin, StoryBoom is ready when you are.

Stay connected—follow StoryBoom on X or LinkedIn
Back to Blog