
From Script to Screen: My StoryBoom Video Creation Workflow
November 19, 2025
November 19, 2025
There are countless ways to develop a story, but I’d like to share the approach that works best for me—especially when creating storyboard-driven animated explainer videos. My style has evolved over the years, as I love to experimented with creative tools, and today, that process begins with something we couldn’t have imagined just a short time ago: AI.
AI has become my launchpad. Whenever a new project idea emerges, I begin by writing out every objective and detail in a single, comprehensive prompt. It’s a simple habit, but a powerful one. The act of typing, refining, and shaping that prompt, helps me clarify my direction and reset my mind before production begins. Reviewing AI-generated suggestions feels like receiving an instant upgrade in both structure and imagination.
Absorbing these “upgrades” gives me momentum. It’s the moment where everything clicks into place—when ideas lift off and I feel ready to create exactly what I envisioned.
Creating fast, clear storyboards doesn’t have to be complicated. When I set out to make the “How to Create a Storyboard” video, my goal was simple: show how a complete storyboard can be built in under a minute using StoryBoom’s streamlined workflow.
What follows in this article is a behind-the-scenes look at the process—how I planned, designed, and produced the final 57-second video.
Before we dive into the details, here’s the finished video:
To show my workflow, I’ll use my latest animated video (embedded above) as an example—a fast, 56-second tutorial on how to create a storyboard using the StoryBoom app. This project took about a week to complete, and while I often say “my team,” the reality is that it was just me and AI. The guidance and feedback helped refine ideas, simplify steps, and sharpen the final result.
Since this video resides within the app (displayed to new users upon sign-in), clarity was essential. The purpose is simple: show how fast and intuitive it is to start a storyboard using the app.
To keep the project organized, I define the main components upfront:
Planning is everything. Even if the final result evolves, a strong outline keeps the project moving forward.
I started by choosing a title from ten AI-generated suggestions and ultimately picked something simple: How to Create a Storyboard. Simplicity matters—especially when your animated video will appear on YouTube, where additional overlays already fill the screen.
For the cover art, I included eight drawings from the Way Cool World animated series to visually express storyboarding in action.
The idea was to walk viewers through each step inside the StoryBoom interface. I already knew how the app’s start screen looked, so I designed each frame to help viewers immediately recognize the process.
To keep visuals clean and consistent, I created all graphics in Adobe Illustrator — my go-to vector tool for over 20 years.
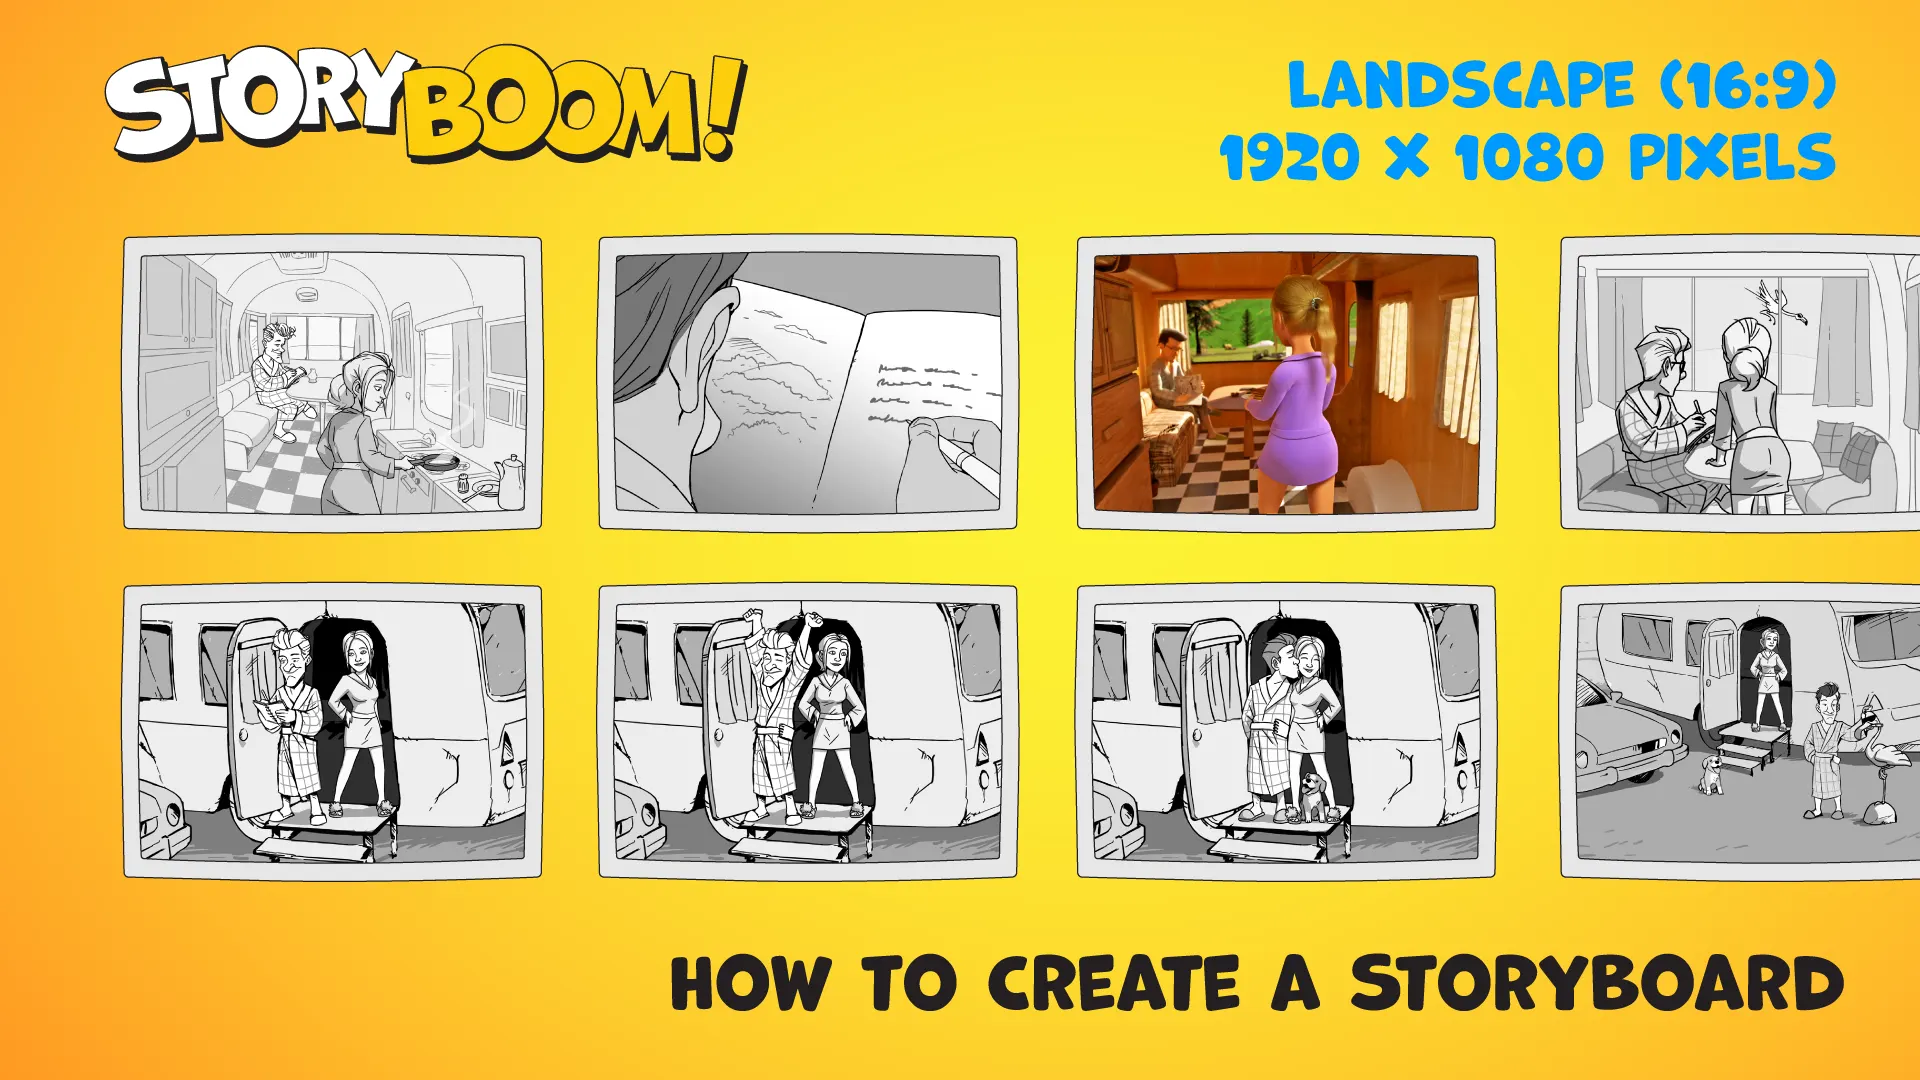
Cover Artwork for How to Create a Storyboard (1920×1080 px)
I wanted the animation to feel engaging and fun, so instead of presenting plain app screenshots, I designed a cartoon-styled version of the software. This small stylistic shift makes the interface feel more like a game and gives viewers a stronger sense of interaction.
Each step flows quickly, with smooth transitions through popups, dropdowns, and many small interactive elements — clicks, reveals, and scene builds.
I begin in StoryBoom by importing the following assets: one cover image, five scene images, two transition screens, and the opening logo. That’s nine frames total, organized across three rows for clear visibility.
Everything is exported from Illustrator as transparent PNGs, making it ideal to work in Premiere Pro. The storyboard scene graphics also serve as props—placeholders in the timeline’s lower layer—helping with precise positioning of individual items. Once everything is added, the placeholder is removed.
The storyboard layout in StoryBoom also acts as a blueprint—every scene description becomes a reminder of what animations or transitions I’ll need later. This speeds up the entire production.
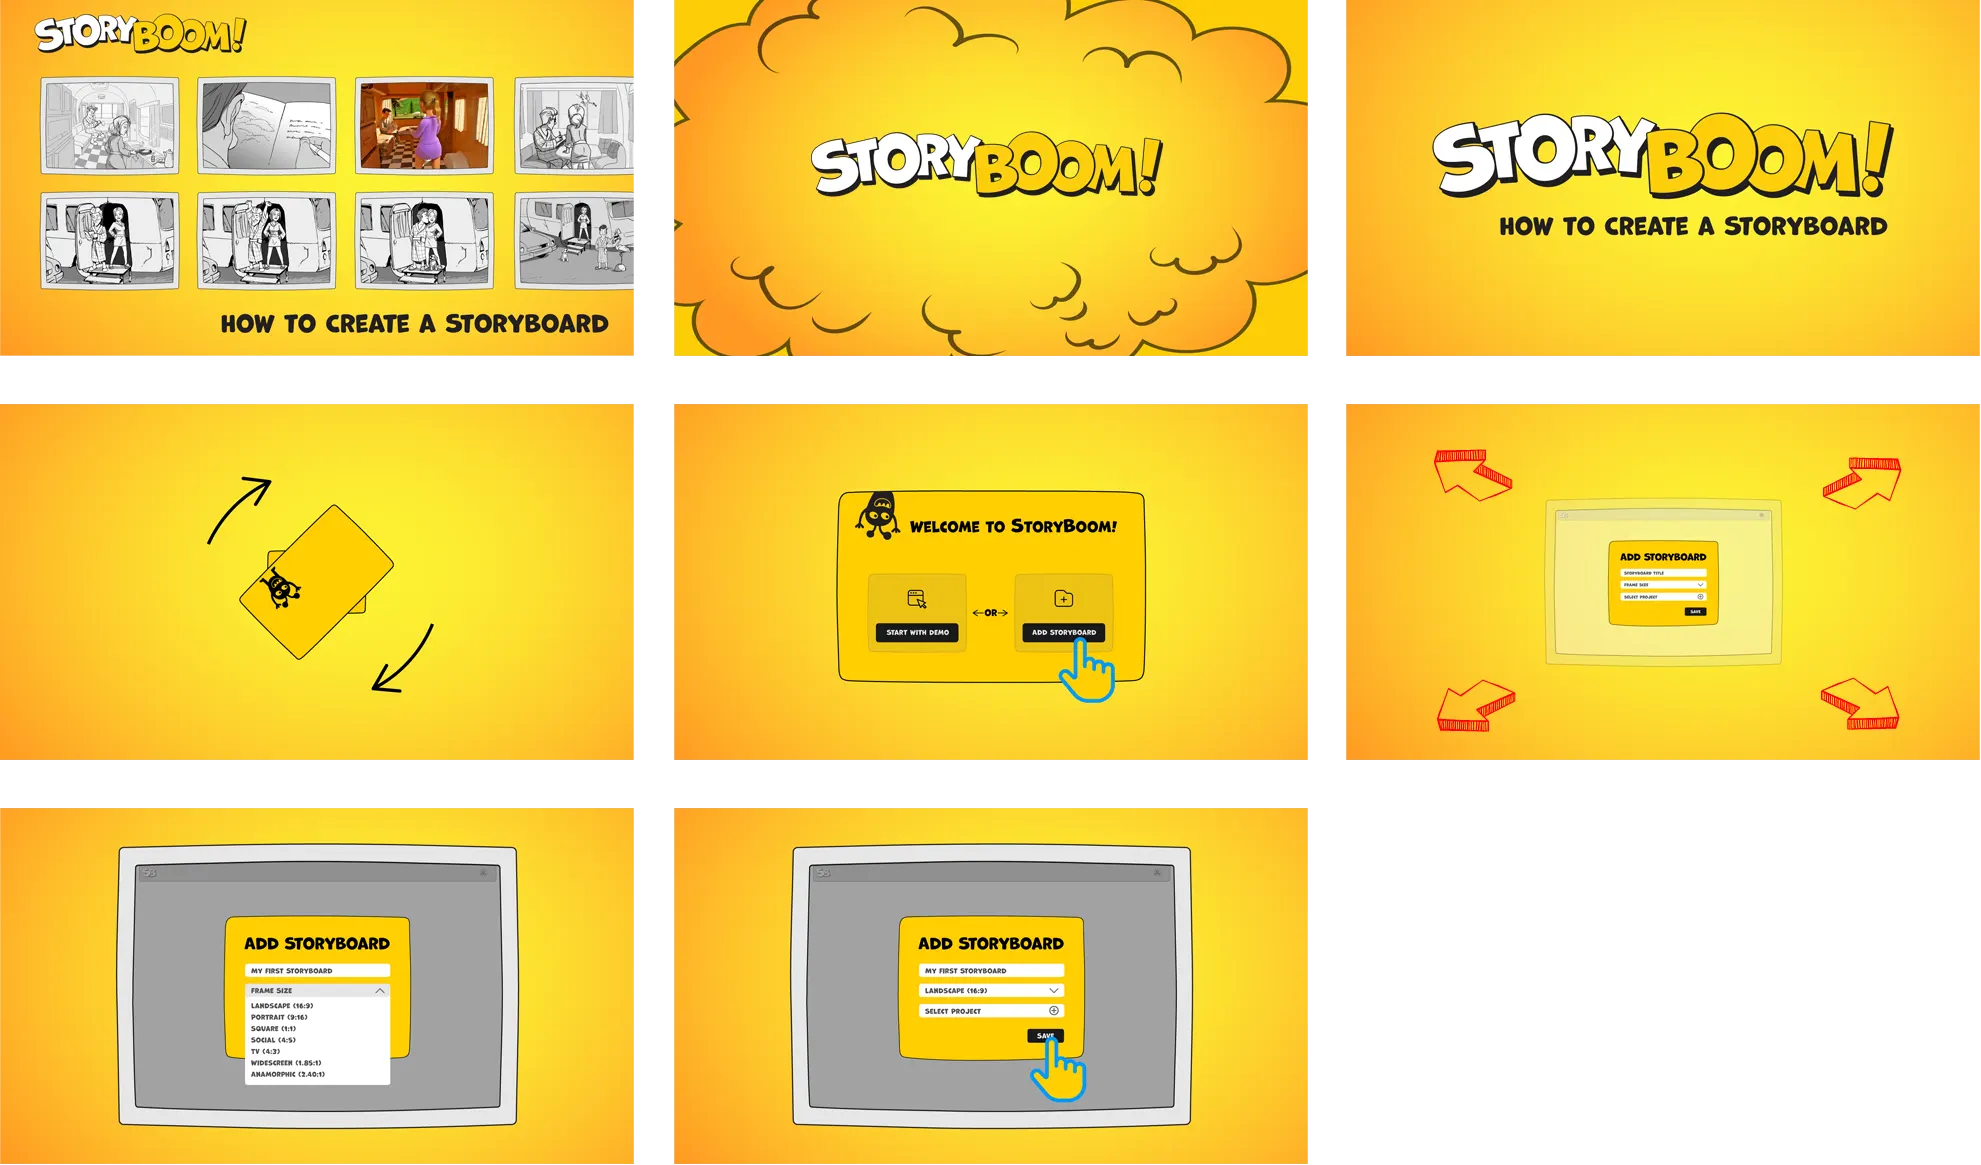
Storyboard layout with the first scenes arranged three per row
This is my seventh animated video, and I continue to refine my workflow as I progress. For example, I scale dropdown menus to 200% inside the video. A larger UI makes options easier to understand during fast transitions—an important lesson in storyboard UI clarity: accuracy matters less than readability.
The playful art style also lets me use large buttons and oversized titles, reinforcing simplicity and viewer comfort.
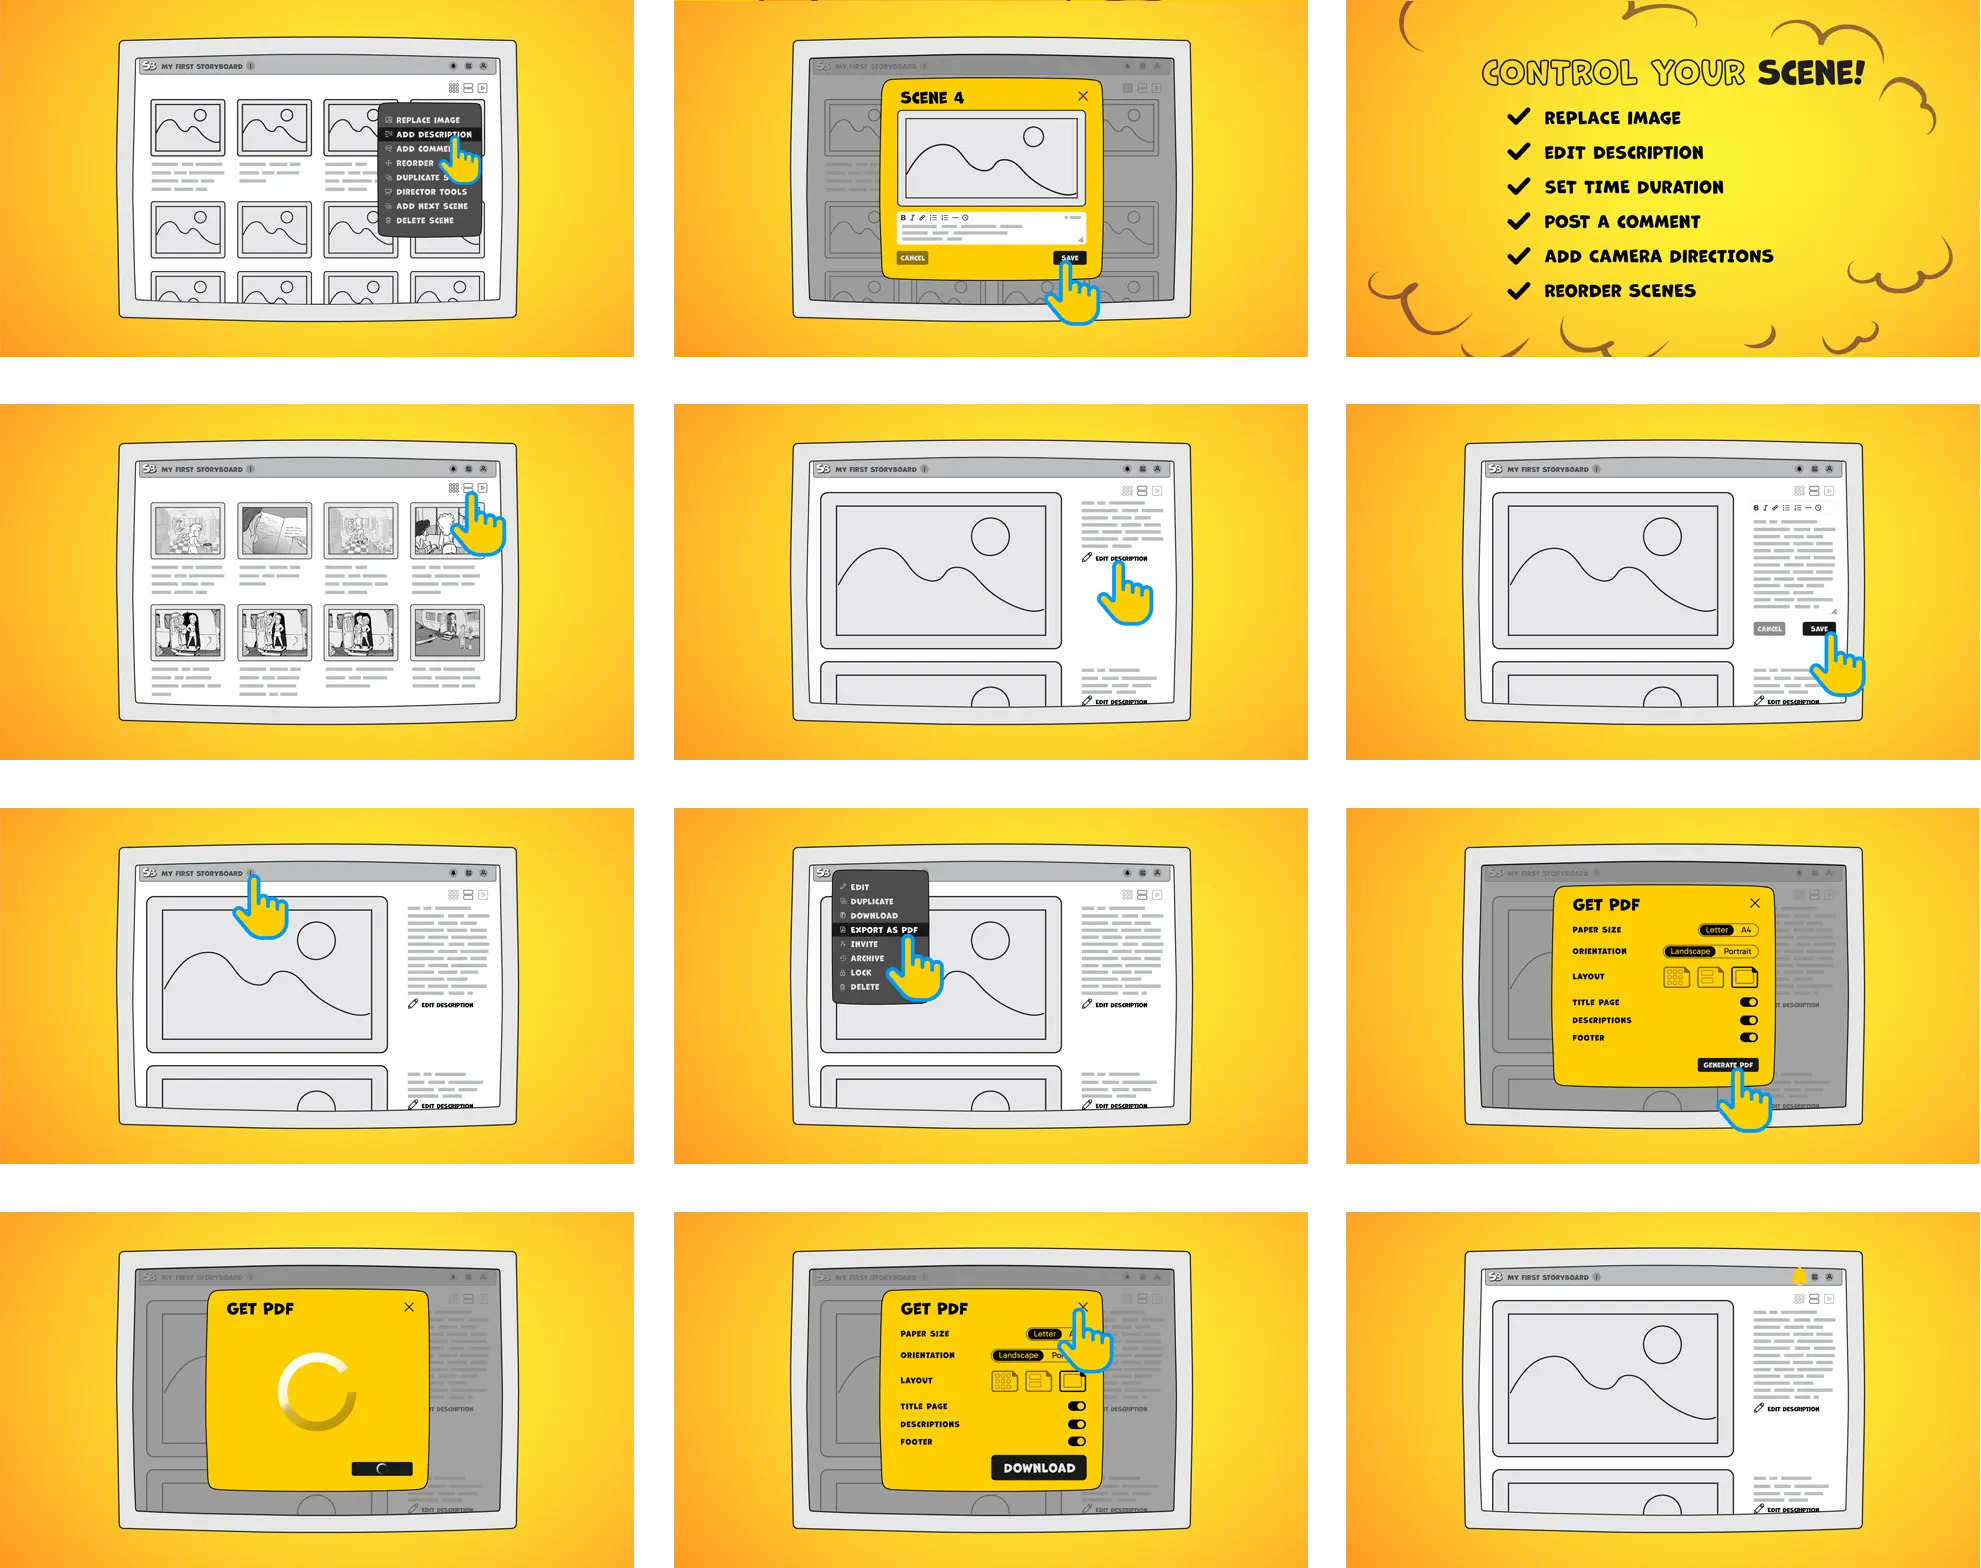
StoryBoom storyboard with twelve scenes, arranged three per row
Video assembly is where the storyboarding process truly comes to life.
Following the storyboard sequence, I arranged every graphic and effect in Premiere Pro. My goal was a fast-paced animation that holds attention while clearly teaching how to create a storyboard inside the app.
I reused animations from previous StoryBoom videos—such as pointer clicks, scaling bubbles, and text animations—to maintain consistent branding and accelerate production.
Consistency equals speed and recognizable identity.
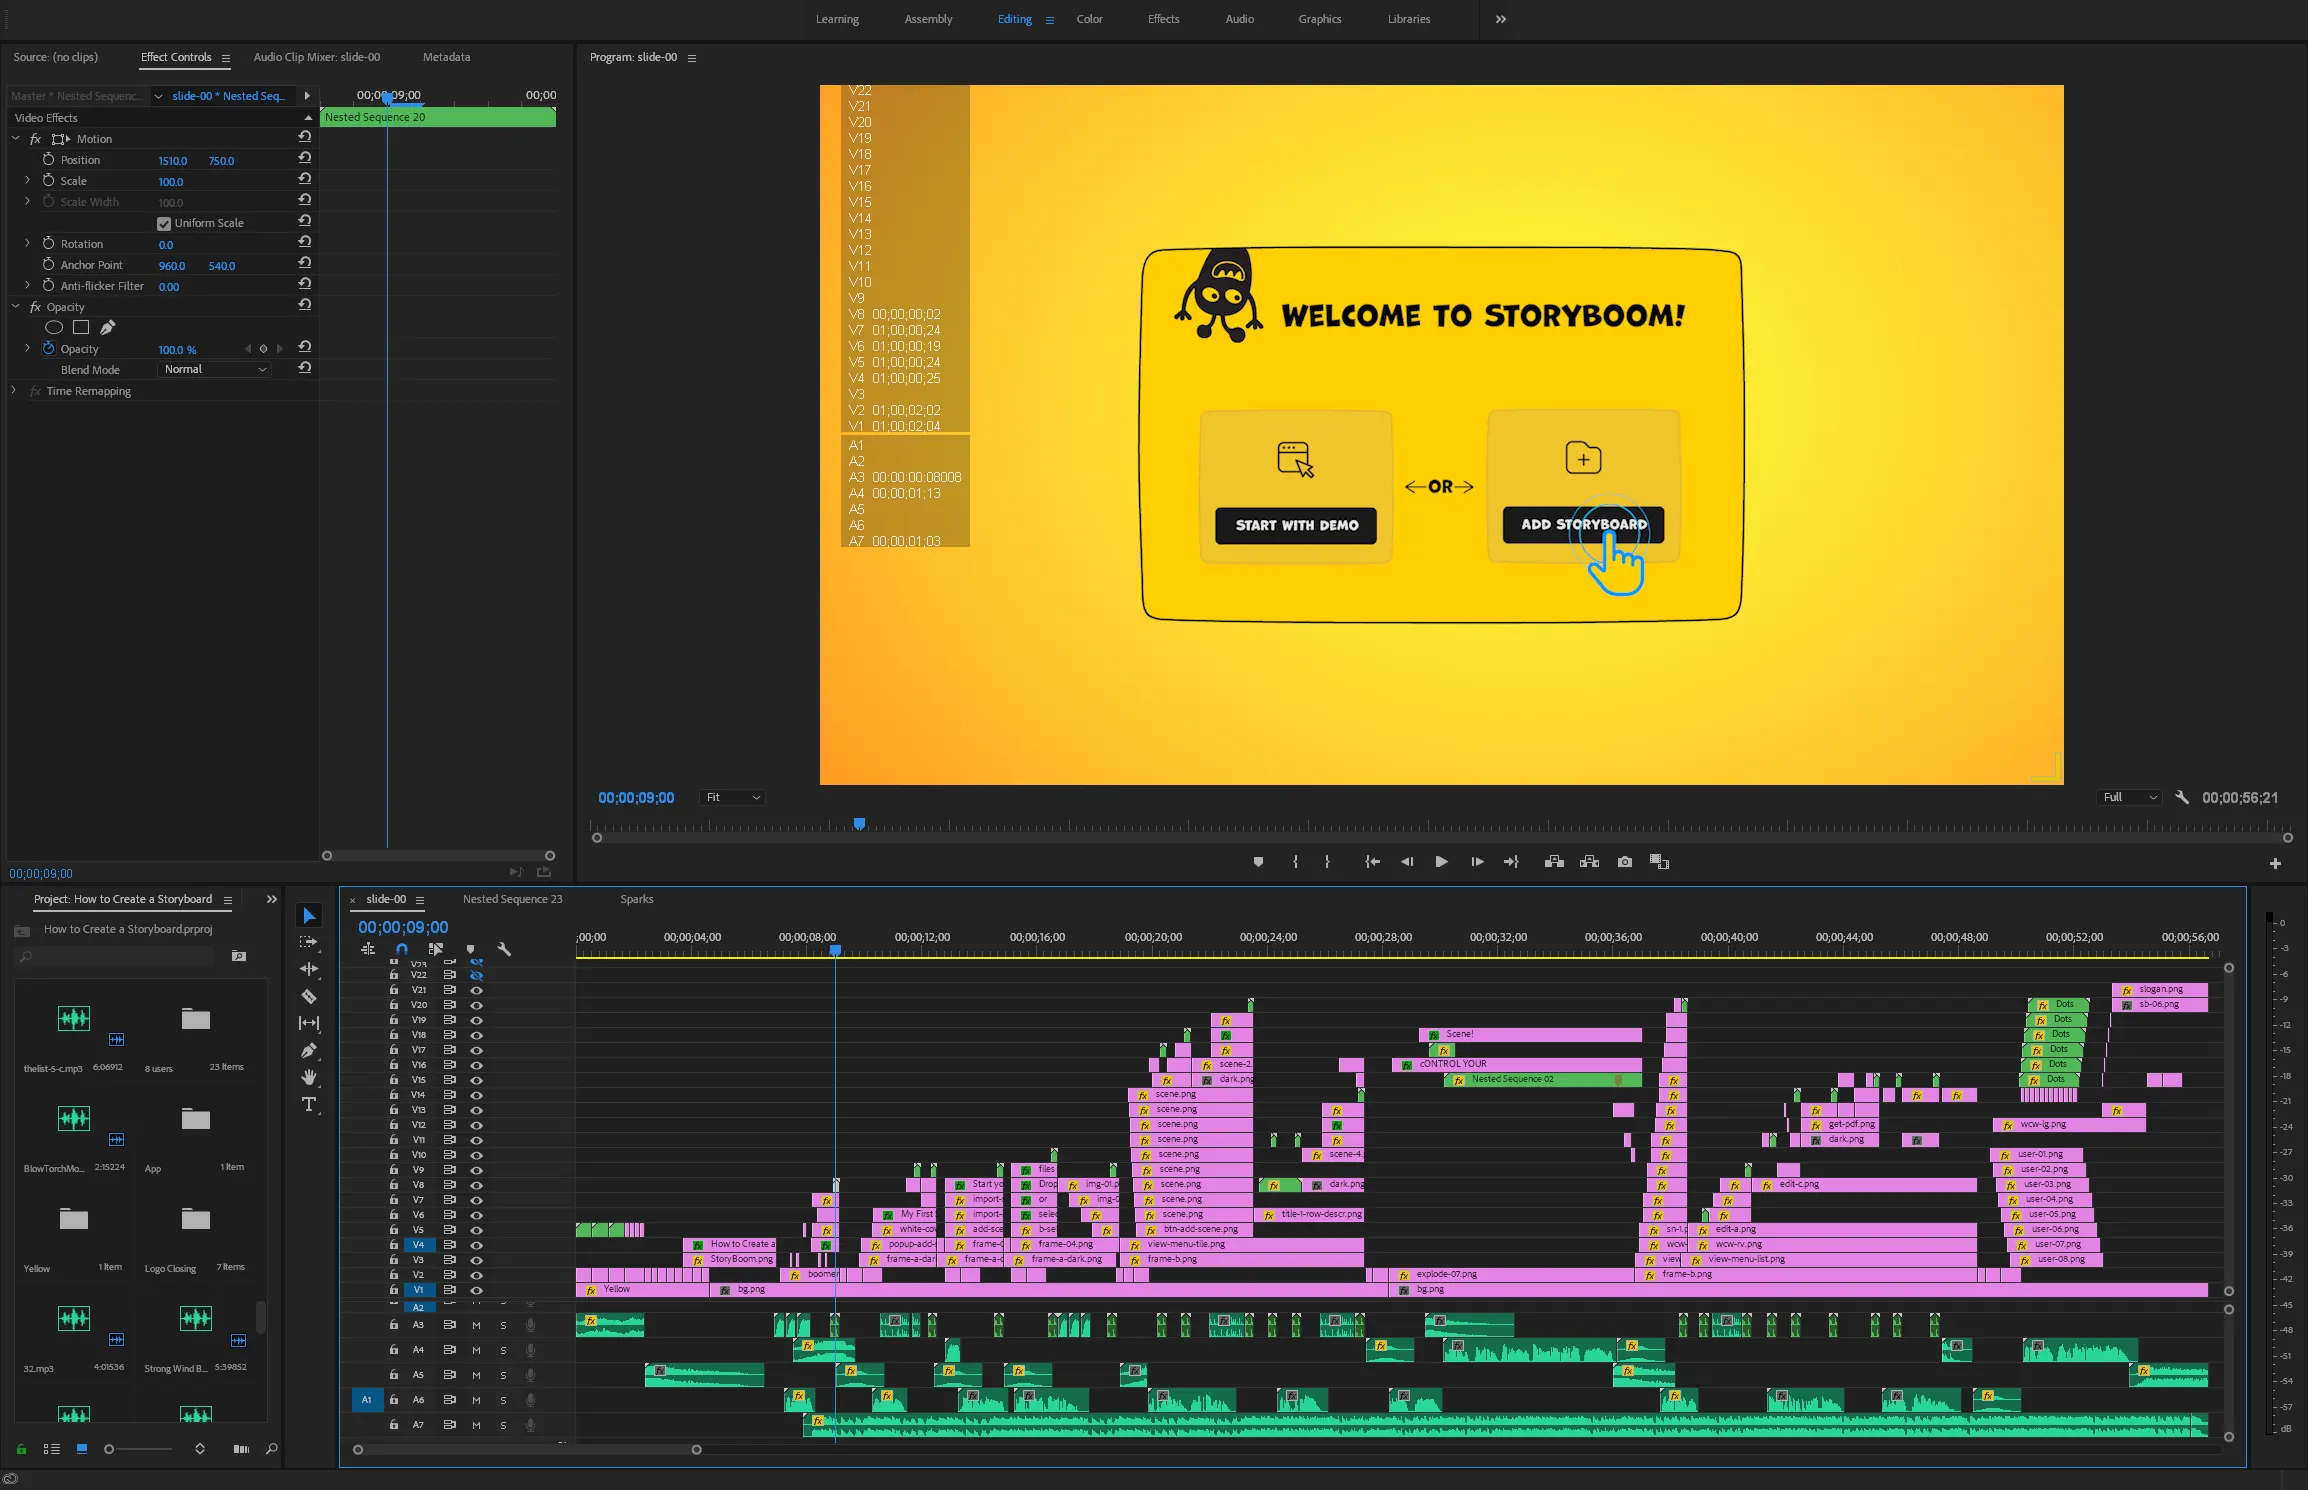
Adobe Premiere Pro video capture — behind the scenes of How to Create a Storyboard (00:56.21)
Once visuals were locked, I added sound.
In this 56-second video, there are 21 click sounds—each carefully aligned with interactions. I also added subtle transitions (“woooow” sounds) to enhance motion.
The voice-over was generated with AI and refined through multiple takes until the pacing matched each scene perfectly. Sometimes I boosted the beginning of phrases for more presence. Small details, big impact.
The background music was trimmed to match the animation’s length.
Here’s the minimalist script for the first seven scenes:
1. Welcome to StoryBoom! (1.3 sec.)
2. Name your storyboard. (1.7 sec.)
3. Jumpstart with visuals. (1.23 sec.)
4. Drop or select files to upload. (2.19 sec.)
5. Click the three-dot icon, select “Add Description.” (3.3 sec.)
6. Repeat for each scene. (1.24 sec.)
7. Control Your Scene! (7.21 sec.)
– Replace Image.
– Edit Description.
– Set Time Duration.
– Post a Comment.
– Add Camera Directions.
– Reorder Scenes.
While finishing this video, I’m already planning the next one. It will focus on collaborative workflows—working in teams, sharing feedback, adding comments, and shaping stories together.
Several new features are also coming to StoryBoom:
Upload a script → automatically generate a structured storyboard outline. A simple starting point for anyone practicing visual storytelling.
Export storyboard scenes as short MP4 clips — perfect for animatics, quick pitches, prototypes, and dynamic presentations.
These tools aren’t about marketing—they’re part of the creative process I use daily. My goal is to share approaches that make storytelling smoother, clearer, and more accessible.
If you want to try the workflow yourself, the free Starter plan is a great place to begin. No credit card, no expiration—just space to create up to 5 storyboards and 80 scenes with a small team or solo.
I hope this article gave you a few new ideas—and maybe even the spark to create something of your own.

Stay connected—follow StoryBoom on X or LinkedIn
Back to Blog